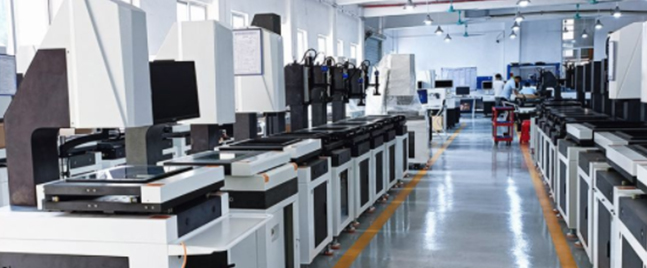
In the high-stakes automotive industry, “close enough” is never good enough. For a leading Tier-1 supplier of critical engine components, dimensional verification was becoming a major bottleneck. Their traditional methods, involving calipers, micrometers, and a manual CMM, were slow, operator-dependent, and inadequate for the complex geometries of new product lines. They needed a faster, more reliable, and automated solution. This is where we, DONGGUAN CITY HANDING OPTICAL INSTRUMENT CO., LTD., came in.
The Challenge: Large Parts, Tight Tolerances, High Throughput
The client was struggling with the inspection of large aluminum castings, specifically gearbox housings. These parts, measuring up to 800mm x 600mm, had hundreds of critical features, including bore diameters, hole positions, and complex profile tolerances. The manual inspection process for a single part could take over two hours, and the results varied between different inspectors. They needed a Vision Measuring System that could handle large components without sacrificing accuracy.
Our Solution: The HANDING OPTICAL Bridge-type Video Measuring Machine
After a thorough consultation and analysis of their components, we proposed our flagship Bridge-type Video Measuring Machine. Here’s why it was the perfect fit:
* Extended Measurement Range: The large gantry-style structure provided the necessary X-Y-Z travel (1000mm x 800mm x 300mm) to measure the entire gearbox housing in a single setup, eliminating the need for repositioning and the associated errors.
* Automated Precision: As an Automatic Video Measuring Machine, it allowed for fully programmable inspection routines. Once the program was created, any operator could load a part, press a button, and receive a complete, unbiased report in minutes. The integration of our high-resolution optical linear encoders ensured unwavering accuracy and repeatability for every measurement.
* Multi-Sensor Capabilities: We configured their VMM with a touch probe in addition to the primary vision sensor. The Video Measuring Instrument could automatically switch between non-contact optical measurement for fast edge detection and touch probe measurement for critical 3D features like deep bores, making it a versatile 3D Video Measuring Machine.
The Results: A Paradigm Shift in Quality Control
The implementation of our Bridge-type VMM was transformative for the client.
* Inspection Time Slashed by 75%: The fully automated inspection routine for a complete gearbox housing was reduced from over 120 minutes to just under 30 minutes.
* Throughput Increased by 400%: The massive time savings allowed them to move from sample-based inspection to 100% inspection of critical parts, drastically reducing the risk of shipping non-conforming products.
* Data-Driven Process Control: The consistent, reliable data from the Vision Measuring Machine was fed back into their CNC machining process, allowing them to make proactive adjustments and improve overall manufacturing quality. The client praised our machine as the most reliable non-contact measuring machine they had ever used.
Your Partner in Productivity
This success story is a testament to our commitment as a world-class Video Measuring Machine Manufacturer. We don’t just sell equipment; we engineer solutions that solve real-world manufacturing challenges. Whether you need a Manual Video Measuring Machine for simple tasks or a sophisticated Semi-automatic Video Measuring Machine, we have the expertise to guide you.
Are you facing a measurement bottleneck?You can email us at 13038878595@163.com. Visit our websites”https://www.omm3d.com”, to explore our full range of Video Measuring Systems (VMS) and let’s write your success story together.
Post time: Aug-18-2025


