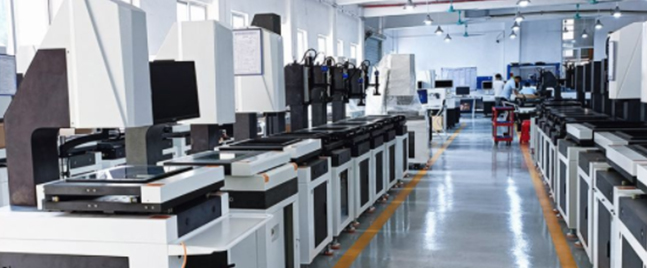
In the competitive landscape of modern manufacturing, quality control (QC) often becomes the bottleneck that restricts production capacity. At Dongguan City Handing Optical Instrument Co., LTD., we interact with quality engineers daily who face a common dilemma: how to achieve 100% inspection rates without slowing down the production line. While traditional Video Measuring Systems (VMM) are incredibly precise, they are not always the fastest solution for every application. Today, we are taking a technical deep dive into the architecture and capabilities of the Instant vision Measuring Machine, contrasting it with traditional methods to help you choose the right Optical Measuring System.

1. The Mechanics of Measurement: Point-to-Point vs. Field of View
To understand the revolution brought by the Instant vision Measuring Machine, we must first look at how a traditional Automatic Video Measuring Machine operates. A standard VMM works on a coordinate system. The camera moves (or the stage moves) to specific coordinates, zooms in, focuses, and captures data points or edges. This is highly accurate for 3D dimensions and deep features but is inherently limited by the speed of the servo motors and the settling time of the axis.
In contrast, our Desktop instant vision measuring machine utilizes a different optical principle. It employs high-resolution, double telecentric lenses with a large depth of field. This means the entire component (or multiple components) is within the “Field of View” (FOV) simultaneously. There is no axis movement during the measurement process itself. The system captures a single image and uses advanced edge-detection algorithms to process all programmed dimensions instantly.
2. Overcoming Size Limitations: Splicing Instant Vision Measuring Machines
A common misconception is that instant measurement is only for small parts like washers or gears. While this was true for early generations, we have innovated with Splicing instant vision measuring machines.
When a part is larger than the lens’s FOV, our system intelligently combines the speed of “flash” measurement with the versatility of a moving stage. The machine captures multiple overlapping images as the stage moves and stitches them together into a coherent, high-precision map. This allows for the rapid inspection of larger components, such as mobile phone frames or large PCB panels, retaining the speed advantage of Instant vision measuring instruments while breaking the size barrier.
3. Software Algorithms: The Brain Behind the Lens
The hardware is only half the story. At Handing Optical, our Video Measuring Machine Manufacturer team places immense emphasis on software capability. Our algorithms include:
Automatic Pattern Matching: You can place a part at any orientation. The software recognizes the part’s shape, aligns the coordinate system virtually, and measures it.
Sub-pixel Edge Detection: By analyzing the grayscale values of pixels, we can determine edge positions with a resolution far higher than the physical pixel size of the camera sensor.
Multi-Part Processing: The ability to identify and measure 50+ parts simultaneously is a game-changer for batch manufacturing.
4. When to Choose a Bridge-type Video Measuring Machine Instead?
We value transparency. While instant machines are fast, they are 2D-centric. If your application requires measuring Z-axis height with high precision, or if you need to measure deep blind holes, a Bridge-type Video Measuring Machine or a 3D Video Measuring Machine is still the superior choice. These Video Measuring Instruments can be equipped with touch probes (contact measurement) or laser sensors (non-contact measuring machine) to capture complex 3D geometries that a telecentric lens cannot “see.”
5. Maintenance and Calibration of Optical Systems
Maintaining the accuracy of an Optical Measuring Machine requires discipline. For our international clients, we recommend a strict maintenance schedule:
Calibration: Use a certified glass calibration plate to verify the pixel-to-dimension ratio regularly.
Environment: Instant measurement relies heavily on lighting. Ensure the backlight and surface ring light are free from dust and functioning uniformly.
Linear Scales: Even for optical systems, the internal positioning relies on optical linear encoders. Ensuring these are clean and dust-free is vital for Splicing instant vision measuring machines where stage movement is involved.
6. Conclusion
Whether you require the rapid-fire speed of a Horizontal Instant vision Measuring Machine for turned parts or the rigorous 3D analysis of a CNC Video Measuring Machine, Dongguan City Handing Optical Instrument Co., LTD. offers a comprehensive portfolio tailored to your needs. We are dedicated to helping you optimize your QC process, reducing cycle times while maintaining global standards of precision.
For a detailed consultation on which Vision Measuring System fits your production line, please reach out to our engineering team.
Contact Us:
Email: handing3d@163.com
Post time: Dec-11-2025


